
Dip Powder Nails: 5 Application Steps Every Nail Tech Should Know
Dip powder nails have become one of the most popular nail services. Clients love the durability and vibrant colors. They love the chip-free finish this technique gives. For nail techs, mastering dip powder nails opens doors to higher prices and happy clients.
This technique differs from regular polish and gel systems. Instead of curing under a lamp, dip powder nails use a bonding liquid. This liquid hardens when exposed to air. It creates a strong, light enhancement that can last three weeks or more.
This article walks through five key steps for creating beautiful dip powder nails. Whether you are learning or refining your skills, these basics will help you deliver pro results.
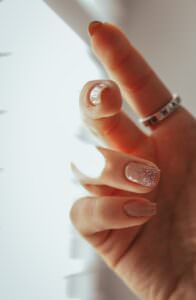
Why Clients Choose Dip Powder Nails
Knowing why clients request dip powder nails helps you recommend this service well. The technique offers several benefits that appeal to different needs.
Durability tops the list of benefits. Dip powder nails resist chipping and lifting better than regular polish. Active clients who are hard on their hands love this lasting power. The color stays vibrant until removal.
The process also appeals to many clients. Unlike gel systems, dip powder nails do not need UV or LED lamp curing. Some clients want to avoid light exposure. Others just like the faster service time.
Step 1: Proper Nail Prep
Every successful dip powder nails service begins with thorough prep. The natural nail must be clean, dry, and shaped right before any product goes on. Skipping this step guarantees poor results.
Start by removing any existing polish or enhancement. Clean the nails with a dehydrating cleanser. This removes oils and residue. Push back cuticles gently. Do not cut them. Trim and shape the nails to the client’s desired length.
Lightly buff the nail surface to create texture. This helps the bonding liquid stick. Be careful not to over-buff. That thins the nail and causes damage. A few gentle strokes in one direction is enough.
Sanitization Standards
Professional dip powder nails work requires strict sanitization. Clean all tools between clients with hospital-grade disinfectant. Wear gloves throughout the service.
Never let clients dip their fingers into powder jars used on others. This spreads bacteria. Instead, pour powder into a small dish. Or brush it onto the nail. Single-use methods protect everyone.
Sanitization builds trust and protects your license. Clients notice when you follow proper rules. Your attention to cleanliness reflects your overall skill.
Step 2: Applying the Base Coat
The base coat creates the base for dip powder nails adhesion. This bonding liquid makes the powder stick to the natural nail. Proper application ensures the enhancement stays put for weeks.
Apply a thin, even layer of base coat to one nail at a time. Work quickly. The product begins to activate once exposed to air. Cover the entire nail surface. Do not flood the cuticle area.
Keep the base coat off the skin around the nail. Product on the cuticle or sidewalls causes lifting. Use a small brush dipped in acetone to clean up any mistakes before moving on.
Working Efficiently
Speed matters when applying base coat for dip powder nails. The liquid starts to set within seconds. Building a quick, confident technique takes practice.
Work on one hand at a time. Complete all nails before switching hands. This prevents the first nails from over-drying. Consistent timing produces consistent results.
If the base coat becomes too tacky before you add powder, apply a fresh layer. Working with product that has partially set creates an uneven finish.

Step 3: Applying the Powder
The powder step gives dip powder nails their signature look. Color and strength come together here. Technique at this stage determines the final look.
Right after applying base coat, dip the nail into the powder at a forty-five degree angle. Or use a clean brush to dust powder over the nail surface. Either method works when done right.
Tap off excess powder gently. The goal is an even coating. No clumps or bare spots. Check coverage from many angles before moving to the next nail.
Building Color and Strength
Most dip powder nails need two to three layers for full color and strength. Repeat the base coat and powder steps for each layer. More layers create stronger, more vibrant results.
Add a layer of clear powder on top. This acts as a protective buffer. It protects the color layer during filing and shaping. The clear acts as a layer you can file without hurting the design.
Allow enough drying time between layers. Rushing causes the powder to lift or become lumpy. Patience produces the smooth, flawless finish clients expect.
Step 4: Shaping and Smoothing
After building the dip powder nails enhancement, refining the shape creates a polished look. Filing and buffing smooth any bumps. They create the desired nail shape.
Use a medium-grit file to shape the free edge. Work from the sides toward the center in one direction. Avoid sawing back and forth. That can cause the powder to lift or crack.
Buff the entire surface gently to remove ridges and bumps. The nail should feel totally smooth before applying sealant. Any texture at this stage will show through the finished product.
Attention to Detail
The cuticle area needs careful attention during shaping. File gently to thin the product near the cuticle line. This creates a natural-looking change from enhancement to skin.
Check the sidewalls for any overhang or rough edges. Clients notice problems in these areas when they look at their hands. Clean, even edges show professional quality work.
Take your time during the shaping step. Rushing creates visible flaws. These cannot be fixed without starting over. The extra minutes spent here save time later.

Step 5: Sealing and Finishing
The final step transforms dip powder nails into a glossy, professional manicure. Sealant products harden the powder. They create the finished look clients love.
Apply a thin layer of activator or sealant liquid. This product hardens the powder. It prepares it for top coat. Allow it to dry fully before moving on.
Apply top coat for shine and protection. Two thin layers usually produce the best results. The top coat seals everything together. It provides the glossy or matte finish the client requested.
The Finished Product
Properly finished dip powder nails should feel smooth and light. The color should be even and vibrant. The shape should be the same on both hands.
Apply cuticle oil around each nail after the top coat dries. This feeds the surrounding skin. It adds a polished final touch. It also shows clients you care about the whole experience.
Review your work carefully before calling the service complete. Check for any problems you can correct. Happy clients return and tell others about you.
Removal and Maintenance
Teaching clients proper care extends the life of their dip powder nails. Tell them what to expect. Show them how to maintain their manicure at home.
Dip powder nails should be removed by a pro. This protects the natural nail. Picking or peeling damages the nail plate. It causes thinning. Acetone soaking safely dissolves the product.
Have clients return for maintenance every two to three weeks. Regular fills keep the enhancement looking fresh. They prevent too much growth at the cuticle area.
Building Your Dip Powder Skills
Getting good at dip powder nails takes practice beyond class. Work on practice hands and volunteer models. Build speed and confidence. Each application teaches you something new.
Stay current with product news and techniques. The dip powder category keeps evolving. New colors, finishes, and methods come out often. Continuing education keeps your skills sharp.
Watch experienced techs work when possible. Seeing different approaches helps you refine your own technique. You might find shortcuts or tips that improve your speed.
Common Mistakes to Avoid
New techs often make similar errors with dip powder nails. Knowing these helps you avoid them.
Applying base coat too thick causes bubbles and lifting. Keep it thin and even. Less is more with base coat.
Not allowing enough dry time between layers causes problems. The powder needs time to set. Rushing leads to lumpy results.
Using contaminated powder spreads germs. Always use fresh powder for each client. Never share jars.
Filing too aggressively damages the enhancement. Use light, steady strokes. Let the file do the work. Do not press hard.
Skipping the clear powder layer is another mistake. This protective layer matters. It keeps your color safe during shaping.
Tools for Dip Powder Success
Having the right tools makes dip powder nails easier. Invest in quality products from the start.
Good brushes for base coat application matter. The brush should be the right size for the nail. It should hold product evenly.
A variety of files and buffers helps. You need medium grit for shaping. You need fine grit for smoothing. Each does a different job.
Small dishes for powder keep things sanitary. Pour only what you need for each client. Throw away any leftover powder after use.
Lint-free wipes are essential. They clean the nail without leaving fibers. Fibers in your work cause bumps.
 Add Dip Powder to Your Services
 Add Dip Powder to Your Services
Dip powder nails represent a growing part of the nail industry. Clients actively seek techs who offer this service. Adding it to your menu increases what you can earn.
Quality training gives you the base for excellent dip powder work. Learning proper technique from the start prevents bad habits.
If you want to learn dip powder nails and other nail enhancement systems, explore nail technology programs near you. Full training prepares you to serve clients with confidence and skill.
Cameo College of Essential Beauty · Murray, Utah
Ready to explore Nail Artistry?
Get hands-on training and see upcoming start dates, hours, and full program details.
Explore the Nail Artistry Program