
Brow Lamination Training: 5 Skills You Will Master in Certification
Brow lamination training prepares you for one of beauty’s hottest services. Clients want full, fluffy brows that stay in place. This treatment delivers that look for weeks at a time.
The service reshapes brow hairs using a chemical process. It lifts them up and sets them in place. The result is thick, groomed brows that need little daily styling.
Brow lamination has exploded in popularity. Social media made the brushed-up brow look trendy. Now clients everywhere want this service. Trained techs are in high demand.
This article covers five key skills you will learn in brow lamination training. These skills help you offer safe, beautiful results.
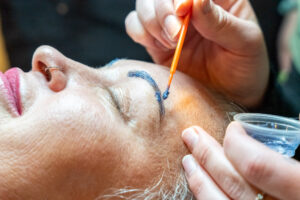
Why Brow Lamination Training Matters
This service uses chemicals on delicate facial skin. Without proper training, things can go wrong. Burns, overprocessing, and allergic reactions are all risks.
Brow lamination training teaches you to work safely. You learn correct timing and technique. You learn to assess who should and should not get the service.
Trained techs also get better results. They know how to customize the treatment. They can handle tricky brow types. Clients notice the difference.
The Growing Demand
Brow services are a major beauty category. Clients spend billions each year on brow products and treatments. Lamination is one of the fastest growing services.
The treatment lasts four to eight weeks. This means clients return regularly. One brow lamination client can book six to twelve times a year.
Adding this service to your offerings makes business sense. It brings in new clients. It gives existing clients another reason to visit.
Skill 1: Client Assessment and Consultation
Brow lamination training starts with learning who can get the service. Not everyone is a good candidate. Assessment prevents problems before they start.
You will learn to evaluate brow condition. Damaged, over-tweezed, or very sparse brows may not work well. The hairs need to be healthy enough to process.
What to Check
Skin sensitivity is important. Check for redness, irritation, or active breakouts near the brows. These clients should wait until skin heals.
Recent facial treatments matter too. Retinol use, chemical peels, or waxing can make skin too sensitive. Ask about their recent skincare routine.
Allergies must be discussed. The chemicals used can cause reactions. A patch test helps identify sensitive clients.
Medication can affect results. Some prescriptions change how skin and hair respond to chemicals. Get a full health history before treating.
Consultation also means setting expectations. Show before and after photos. Explain what the service can and cannot do. Clients should know what to expect.
 Skill 2: Proper Product Application
 Skill 2: Proper Product Application
Brow lamination uses a series of solutions. Each one does something different. Brow lamination training teaches you to apply each product correctly.
The first solution breaks down the hair bonds. This makes hairs flexible and easy to reshape. Timing is critical at this stage.
The Application Process
Clean brows completely before starting. Oil, makeup, and residue block the products from working. Use a gentle cleanser to prep.
Apply lifting solution to all brow hairs. Work it through from root to tip. Make sure every hair is coated evenly.
Cover with plastic film to keep products active. The warmth helps processing. Some techs use a brow heater too.
Watch the clock carefully. Over-processing damages hair and burns skin. Under-processing gives weak results. Timing varies by hair type.
Remove the first solution completely. Any residue left behind causes problems. Clean gently but thoroughly.
Skill 3: Brow Shaping and Setting
After lifting, you shape the brows. This is where the artistry happens. Brow lamination training teaches you to create beautiful shapes.
Use a spoolie or brush to direct hairs upward. Some go straight up. Some brush to the side at the tail. The shape depends on client preference and face shape.
Setting Techniques
Once hairs are in place, apply the setting solution. This locks in the new shape. The bonds reform in the lifted position.
Timing matters here too. Too long can over-process. Too short may not hold. Follow product instructions exactly.
Some clients want a very dramatic lift. Others prefer a softer look. Adjust how high you brush based on the desired result.
After setting, a neutralizing step may follow. This stops the chemical process. Not all products require this, so know your system.
The final step is often a nourishing treatment. Keratin or conditioning products restore moisture. This helps hair stay healthy and shiny.
Skill 4: Tinting and Finishing
Many brow lamination services include tinting. The two services work beautifully together. Brow lamination training often covers tinting basics too.
Tinting adds color to the brow hairs. It fills in sparse areas visually. It makes the full, fluffy look even more dramatic.
When to Tint
Tinting works best right after lamination. The hair cuticle is still slightly open. Color absorbs better during this window.
Choose a tint color that complements skin and hair tones. Too dark looks harsh. Too light disappears. Find the balance.
Apply tint carefully to avoid skin staining. Work in small sections. Wipe away any product that touches skin quickly.
Processing time is usually short for brow tints. Five to ten minutes gives good results. Check frequently until the color is right.
Remove tint with damp cotton. Be gentle around the freshly treated brows. Clean up any stray color.
Finishing Touches
Shape the brows with clean up if needed. Remove any stray hairs outside the desired shape. Tweeze or wax carefully.
Apply a brow serum or oil to add shine. This finishing touch makes brows look polished. It also helps condition the hair.
Take after photos for your portfolio. Good documentation builds your book of work. Ask clients if you may share their results.

Skill 5: Aftercare Education
What happens after the service matters a lot. Clients need clear aftercare instructions. Brow lamination training teaches you what to tell them.
The first 24 hours are critical. Water and steam can affect the set. Oil-based products can soften the hold.
Aftercare Rules to Share
Keep brows dry for 24 hours after treatment. No showers that spray the face. No steam rooms or saunas.
Avoid touching or brushing brows roughly. The shape is still setting. Gentle handling keeps them in place.
Skip makeup on or near the brows for a day. Foundation and brow products can interfere. Let the treatment settle first.
Use the products you recommend. A nourishing oil or serum helps maintain results. Clients who follow care instructions get longer lasting brows.
Sleep on your back the first night if possible. Crushing brows into a pillow can flatten them. This is not always practical but helps when possible.
Long-Term Care
After the first day, clients can return to normal routines. But some habits help results last.
Avoid oil-heavy skincare near the brows. Oil breaks down the lamination over time. Keep oils away from the brow area.
Brush brows gently each morning. Use a clean spoolie to reshape. This keeps them looking fresh.
Brow lamination typically lasts four to eight weeks. Schedule the next appointment before results fully fade. This keeps brows looking great year-round.
Common Brow Lamination Mistakes
Brow lamination training helps you avoid errors. Knowing common mistakes makes you a better tech.
Over-processing is the biggest risk. Leaving solutions on too long damages hair. It can cause breakage and frizz. Always time carefully.
Under-processing gives disappointing results. Brows do not hold their shape well. They fall back to their original position quickly.
Skipping the patch test is dangerous. Some clients have allergic reactions. A simple test prevents serious problems.
Not assessing brow condition leads to failures. Very damaged brows cannot handle the treatment. Know when to say no.
Forgetting aftercare instructions frustrates clients. When results fade quickly, they blame your work. Good education protects your reputation.
Adding Brow Services to Your Career
Brow lamination training is an investment in your future. The service commands good prices. Clients book regularly once they try it.
This specialty sets you apart from other beauty pros. Not everyone offers lamination. Being one of the few gives you an edge.
Consider pairing lamination with other brow services. Waxing, threading, microblading, and tinting all complement each other. Become a full brow specialist.
Start Your Brow Lamination Training
The demand for brow services keeps growing. Clients want professionals who know what they are doing. Proper training makes you that professional.
Look for certification programs that include hands-on practice. Reading about brow lamination is not enough. You need to work on real brows.
Quality brow lamination training covers safety, technique, and client care. It prepares you for real-world situations. It gives you confidence to charge professional rates.
Your future brow clients are waiting. They want fluffy, polished brows that last for weeks. With the right training, you can give them exactly that.
Questions to Ask Before Training
Not all brow lamination training is equal. Ask these questions before you enroll.
How much hands-on practice is included?
Reading and watching is not enough. You need to practice on real brows. Good programs include live models.
What products will I learn to use?
Different brands work differently. Make sure you learn systems you can actually buy and use after training.
Is the certification recognized?
Check that the cert means something in your area. Some states have specific requirements. Make sure your training counts.
These questions help you choose the right program. Quality training leads to quality results for your future clients.
Cameo College of Essential Beauty · Murray, Utah
Ready to explore Lash & Brow Artistry?
Get hands-on training and see upcoming start dates, hours, and full program details.
Explore the Lash & Brow Artistry Program